A photo cake is a delightful way to make any celebration extra special. Whether it’s for a birthday, anniversary, wedding, or any other event, a photo cake adds a personal touch by incorporating a printed image or design directly onto the cake’s surface. The process of creating a photo cake may seem complex, but it’s actually quite simple and can be done at home with the right tools and ingredients.
In this article, we will guide you step-by-step on how to make a photo cake. From choosing the right cake and icing to printing and placing the photo, we’ll cover everything you need to know to create a beautiful and tasty photo cake.
Ingredients and Materials You’ll Need
Before starting the process, it’s important to have all the necessary ingredients and materials. Here’s a comprehensive list of what you will need:
For the Cake:
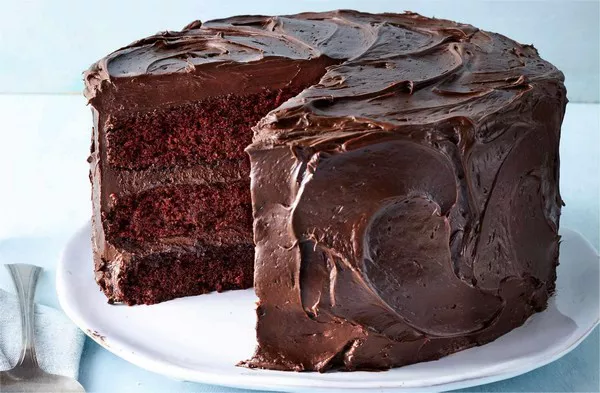
- Your choice of cake mix or homemade cake recipe (usually a vanilla or chocolate cake works best)
- Eggs
- Butter or oil
- Milk or water
- Baking powder
- Sugar
- Flavorings (like vanilla extract, cocoa powder, or any other flavor)
For the Icing:
- Butter (unsalted)
- Powdered sugar
- Vanilla extract or other flavoring
- Milk or cream (to adjust consistency)
For the Photo:
- Edible ink printer and edible paper (or a service to print the photo for you)
- Food-safe ink cartridges
- Photo editing software (optional)
Other Tools:
- Cake pan (usually 8” or 9”)
- Cooling rack
- Spatula
- Piping bags (if decorating with additional icing)
- Scissors
- A smooth cake decorating comb or offset spatula (for smoothing the icing)
Now that you have your materials, let’s dive into the process of making the cake and applying the photo.
Step 1: Baking the Cake
The first step in creating a photo cake is to bake your cake. You can either use a pre-made cake mix or bake from scratch, depending on your preference.
Baking Instructions:
Preheat the Oven: Preheat your oven to the temperature indicated on your cake mix package or recipe (typically 350°F or 180°C).
Prepare the Cake Pan: Grease the cake pan with butter or cooking spray, and lightly dust it with flour. Alternatively, you can line the pan with parchment paper to make it easier to remove the cake once baked.
Mix the Cake Ingredients: In a large bowl, combine your cake mix, eggs, butter, milk, and any additional flavorings. Follow the instructions on your recipe for the best results.
Pour the Batter into the Pan: Once your batter is well mixed, pour it into the prepared cake pan. Tap the pan on the counter to remove any air bubbles.
Bake the Cake: Place the pan in the preheated oven and bake according to the recommended time (usually 25–30 minutes). Check if the cake is done by inserting a toothpick into the center. If it comes out clean, your cake is ready.
Cool the Cake: Allow the cake to cool in the pan for 10 minutes, then transfer it to a cooling rack. Let the cake cool completely before you begin decorating it.
Step 2: Preparing the Icing
While your cake is cooling, it’s time to prepare the icing. The icing needs to be smooth and spreadable so it can hold the photo properly.
Buttercream Icing Recipe:
Ingredients: To make buttercream icing, you will need 1 cup of unsalted butter, 4 cups of powdered sugar, 2 teaspoons of vanilla extract, and 2–4 tablespoons of milk or heavy cream.
Beat the Butter: In a large mixing bowl, beat the butter until smooth and creamy.
Add the Powdered Sugar: Gradually add powdered sugar to the butter, 1 cup at a time, beating well after each addition.
Add Vanilla and Milk: Once all the powdered sugar is incorporated, add the vanilla extract and 2 tablespoons of milk. Continue beating until the icing reaches your desired consistency. If it’s too thick, add more milk; if it’s too thin, add more powdered sugar.
The icing should be thick enough to hold the photo but smooth enough to spread easily on the cake.
Step 3: Frosting the Cake
Once your cake has cooled and your icing is ready, it’s time to frost the cake.
Trim the Cake (Optional): If your cake has risen unevenly, you can level it with a serrated knife so it’s flat.
Apply a Crumb Coat: Start by applying a thin layer of icing to the entire cake to seal in any crumbs. This is called a crumb coat. Don’t worry about making it perfect at this stage; it’s just to ensure the final coat of icing looks smooth.
Chill the Cake: Place the cake in the fridge for 20–30 minutes to set the crumb coat.
Apply the Final Coat of Icing: After chilling, spread a generous layer of icing all over the cake, smoothing it with a spatula. Try to make the icing as even as possible for a professional look.
Step 4: Printing the Photo
The next step is to get the photo ready for the cake. You’ll need to either use an edible ink printer or have a photo printed at a bakery that offers this service.
If You Have an Edible Ink Printer:
Prepare the Image: Choose a high-resolution image you want to use for the cake. You can use photo editing software to resize the image to fit the top of the cake.
Print the Photo: Load the edible ink printer with edible ink and edible paper. Follow the printer’s instructions to print the image. Make sure the photo is printed on a flat sheet of edible paper.
Cut the Image: Once printed, carefully cut out the image from the edible paper using scissors. Be gentle, as the edible paper is delicate.
If you don’t have an edible ink printer, many bakeries offer photo cake printing services. Simply take your image to the bakery, and they will print it for you on edible paper.
Step 5: Placing the Photo on the Cake
Once the cake is frosted and the photo is ready, it’s time to place the image on the cake.
Position the Photo: Carefully remove the edible photo from the paper backing (if using edible paper). Align it over the center of the cake, gently pressing it onto the surface.
Smooth the Photo: If necessary, use a smooth spatula to gently press down the edges of the photo so it sticks to the icing. Be careful not to tear the paper.
Final Touches: After the photo is applied, you can add additional decorations around the edges of the cake. This could include piped icing, sprinkles, or even flowers, depending on your theme.
Step 6: Storing and Serving the Cake
Once your photo cake is complete, it’s time to store it and serve it.
Storage: Photo cakes should be stored in a cool, dry place, away from direct sunlight. You can keep the cake in the fridge, but make sure the photo doesn’t get too cold, as this could affect the appearance.
Serving: When it’s time to serve the cake, use a sharp knife to cut through the icing and photo. The edible ink won’t affect the taste, so your guests can enjoy both the cake and the image.
Tips for a Perfect Photo Cake
High-Quality Photo: Choose a high-resolution photo for the best results. A blurry or low-quality image will not print well on the cake.
Don’t Overdo It on the Icing: Apply just enough icing to create a smooth base. Too much icing may overwhelm the photo.
Practice: If it’s your first time making a photo cake, it may take some practice to get everything just right, especially the printing and placement of the photo.
Conclusion
Making a photo cake is a fun and creative way to add a personal touch to your celebrations. By following these simple steps, you can create a beautiful and delicious cake that not only looks amazing but also tastes fantastic. Whether you’re celebrating a birthday, wedding, or any other event, a photo cake is sure to impress your guests and create lasting memories. With a little practice, you can perfect the technique and make photo cakes for all your special occasions.
Related Topics:


