Drip cakes have become a popular choice for birthdays, weddings, and special occasions. The signature look of a drip cake is the smooth ganache or glaze that gently flows down the sides of the cake. This guide will teach you how to achieve that perfect drip effect at home. Follow these steps, and you will create a beautiful drip cake that impresses your family and friends.
What Is a Drip Cake?
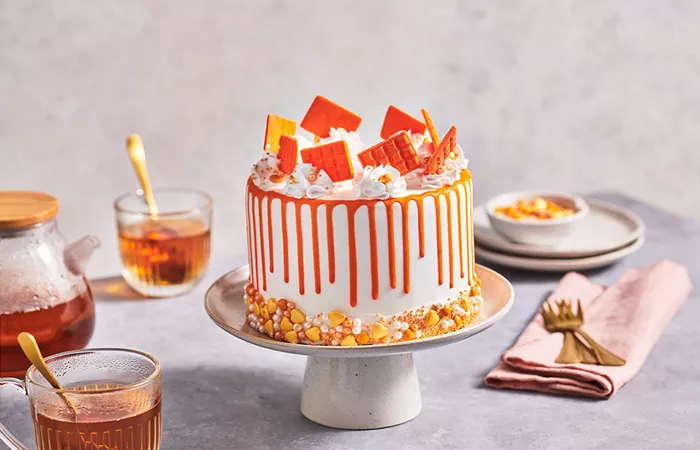
A drip cake is a cake that is decorated with drips of ganache, glaze, or icing. The drips flow down the sides of the cake, creating a stylish and eye-catching look. You can use different colors and flavors for the drip to match your theme.
What You Need for the Perfect Drip
Before you start, gather the following items:
- A cake – This can be a layered cake that is frosted and chilled.
- Ganache or glaze – Usually made from chocolate and cream or candy melts and cream.
- A spoon or piping bag – For applying the drip.
- A turntable – This helps with smooth and even dripping.
- Offset spatula – For spreading and adjusting the drip if needed.
How to Make Ganache for Drip Cake
The most common drip is chocolate ganache. Here is a simple recipe:
- Use equal parts chocolate and heavy cream for dark chocolate ganache.
- For white chocolate ganache, use two parts chocolate to one part cream.
Heat the cream until hot but not boiling. Pour it over chopped chocolate. Let it sit for a minute, then stir until smooth. Let it cool until it reaches the right consistency. The ganache should flow but not be too runny.
Step-by-Step Guide to making the Drip on a Drip Cake
Step 1: Prepare Your Cake
Make sure your cake is frosted and well chilled. A cold cake helps the ganache set quickly, so the drips do not slide all the way down. Place the cake on a turntable to make it easier to work.
Step 2: Test the Drip
Before you start on the cake, test the ganache on the side of a bowl or a piece of parchment paper. This will help you see if it is too thick or too thin. If it is too thin, let it cool longer. If it is too thick, warm it for a few seconds.
Step 3: Apply the Drip
Use a spoon or a piping bag to apply the ganache to the edge of the cake. Start with a small amount. Let it drip naturally. Move around the cake and vary the length of the drips for a natural look.
Step 4: Cover the Top
Once the drips are done, pour some ganache on top of the cake. Use an offset spatula to spread it evenly. Be gentle so you do not disturb the drips.
Step 5: Add Final Touches
Decorate the top of the cake with sprinkles, fruit, candies, or flowers. Make sure the decorations match the theme of your cake.
Tips for Success
- Chill your cake before applying the drip.
- Check ganache temperature – It should be about room temperature.
- Use good quality chocolate for a smooth finish.
- Practice drips before doing the cake.
- Clean tools to avoid smudges on the cake.
Common Mistakes and How to Fix Them
Ganache too runny: Let it cool more before applying.
Ganache too thick: Warm it for a few seconds in the microwave.
Drips too long: Use a cold cake to help the ganache set faster.
Uneven drips: Apply ganache slowly and adjust with a spatula if needed.
Different Drip Variations
You can use colored candy melts or white chocolate ganache with gel food coloring. You can also add flavor extracts like mint, orange, or coffee to your ganache for a unique taste.
How to Store a Drip Cake
Keep the cake in the fridge if not serving right away. Let it sit at room temperature for 30 minutes before serving so the ganache softens slightly.
Frequently Asked Questions
Can I use store-bought frosting for drips? It is better to use ganache or glaze because they flow better and set nicely.
How far in advance can I make a drip cake? You can make it a day ahead. Just store it in the fridge.
Do I need to color white chocolate ganache? No, but coloring it allows you to match the theme of your event.
Conclusion
Creating the perfect drip on a drip cake takes practice and patience. By following these steps, you will master the technique. Remember to chill your cake, test your ganache, and apply the drips slowly. Have fun decorating and enjoy your delicious creation!
Related topics:


