Apple cider vinegar comes from fermented apple juice. People have used it for centuries. It offers many health benefits. You can buy it in stores. But homemade versions often work better. Making it yourself ensures quality. You control the ingredients. No additives or preservatives get included.
The process involves two main steps. First, yeast breaks down apple sugars. This creates alcohol. Then bacteria turn alcohol into acetic acid. This gives vinegar its sour taste. Proper fermentation takes time. But some methods speed things up.
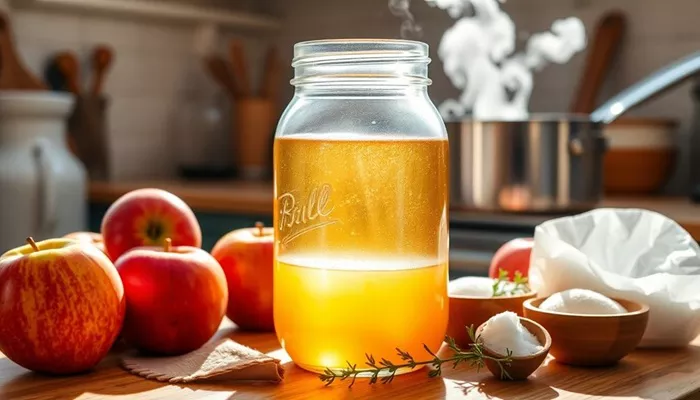
Gathering Necessary Supplies
You need basic equipment to start. Most items are probably in your kitchen already. Here’s what to prepare:
- Clean glass jars or bottles
- Cheesecloth or thin kitchen towel
- Rubber bands or string
- Wooden spoon
- Measuring cups
- Funnel
- Organic apples (any variety works)
- Sugar or honey (optional)
- Filtered water
Sterilize all containers first. Boil them for ten minutes. This kills unwanted bacteria. Let them air dry completely. Contamination ruins fermentation.
Choosing the Right Apples
All apples work for vinegar making. But some types perform better. Organic apples have more natural yeasts. These help start fermentation faster. Mixed varieties create complex flavors. Consider these options:
- Sweet apples (Fuji, Gala): ferment quickly
- Tart apples (Granny Smith): add tanginess
- Old apples: perfectly fine to use
Wash apples thoroughly. Remove any stickers or wax coatings. Don’t peel them. The skins contain important yeasts. Cut out any bruised parts though.
Preparing the Apple Mixture
Chop apples into small pieces. Smaller pieces mean faster fermentation. You can also grate them. Include cores and seeds. These parts have lots of natural yeasts.
Place apple pieces in your clean jar. Fill about three-quarters full. Add one tablespoon of sugar per apple. Sugar feeds the fermentation process. Honey works too if you prefer.
Pour filtered water over the apples. Leave two inches of space at the top. Stir well with a wooden spoon. The mixture should look cloudy. That’s normal and good.
Starting the Fermentation Process
Cover the jar with cheesecloth. Secure it with a rubber band. This allows air flow but keeps bugs out. Place the jar in a warm, dark spot. Ideal temperature is 70-80°F (21-27°C).
Stir the mixture daily. Use a clean wooden spoon each time. This prevents mold formation. After 3-5 days, bubbles will appear. This shows fermentation has started.
The liquid will become slightly alcoholic. This first stage takes about 1-2 weeks. When bubbling slows down, move to the next phase.
Converting to Vinegar
Now strain out the apple solids. Pour the liquid into a clean jar. Cover again with cheesecloth. Continue fermenting for 2-4 more weeks.
A jelly-like film may form on top. This is called the “mother.” It’s a colony of beneficial bacteria. Don’t remove it. The mother helps make vinegar faster.
Taste your vinegar weekly. It’s ready when pleasantly sour. The process typically takes 3-5 weeks total. Warmer temperatures speed it up.
Speeding Up the Process
Traditional methods take months. But you can accelerate fermentation. Try these professional tips:
- Maintain consistent warmth – use a seedling mat
- Add some store-bought vinegar with mother
- Stir more frequently – up to 3 times daily
- Use smaller containers – more surface area helps
- Add a pinch of yeast nutrient
Monitor closely when speeding things up. Check flavor and smell often. If anything seems off, start over.
Testing for Readiness
Your vinegar is ready when:
- It smells sharp but pleasant
- The taste makes your mouth pucker
- No sweetness remains
- The liquid appears clear with sediment at bottom
Cloudiness is normal initially. It should clear over time. If vinegar smells rotten, discard it. Proper vinegar never smells foul.
Storing Your Homemade Vinegar
Pour finished vinegar through a coffee filter. This removes sediment. Transfer to clean bottles. Seal with tight lids. Store in a cool, dark place.
Properly made vinegar lasts indefinitely. Quality may improve with age. The mother may continue growing. You can use it to start your next batch.
Using Your Apple Cider Vinegar
Homemade vinegar has many uses:
- Salad dressings and marinades
- Digestive health tonic
- Natural cleaning product
- Skin and hair care
- Preserving foods
Start with small amounts. Even healthy people should dilute it. Never drink straight vinegar. It can damage tooth enamel.
Troubleshooting Common Problems
Sometimes issues arise. Here’s how to fix them:
- Mold growth: discard entire batch, sterilize equipment better next time
- No bubbles after a week: add a pinch of yeast, move to warmer spot
- Vinegar too weak: let ferment longer, add more sugar
- Vinegar too strong: dilute with water before use
Remember – patience is key. Rushing too much can ruin your batch.
Health Benefits of Homemade Vinegar
Your homemade version offers advantages:
- Contains live probiotics
- Higher nutrient content
- No pasteurization destroys benefits
- Customizable flavor
- Free from additives
Studies suggest apple cider vinegar may help with:
- Blood sugar control
- Weight management
- Cholesterol levels
- Digestive issues
Always consult your doctor before using for health purposes. Vinegar interacts with some medications.
Safety Considerations
Follow these guidelines for safe vinegar making:
- Use only glass, wood, or plastic utensils
- Never use metal containers or tools
- Watch for signs of spoilage
- Keep everything clean
- Don’t consume if smell seems off
Pregnant women and immunocompromised individuals should exercise caution. When in doubt, throw it out.
Conclusion
Making apple cider vinegar quickly requires the right techniques. Choose good apples, maintain proper conditions, and monitor progress. While traditional methods take months, you can produce quality vinegar in weeks. The result is a flavorful, healthful product free from store-bought additives. Remember that even accelerated fermentation needs some time. Rushing the process too much affects quality. With practice, you’ll develop your own efficient method. Homemade apple cider vinegar makes a rewarding kitchen project with many practical uses. Start with a small batch to learn the process, then scale up as you gain confidence. Your body and taste buds will thank you for this wholesome, natural product.
Related Topics:
Best Way to Lose Weight with Apple Cider Vinegar


